

Make this no knead bread recipe for a crispy crust and tender crumb. Minimal hands-on time and an extended rise create huge taste with nearly no effort.

Need to bake straightforward home made bread? Attempt my perfect no knead bread recipe! My mother and father have been making recipe since I revealed it years in the past, and so they have confirmed: this bread is really life altering.
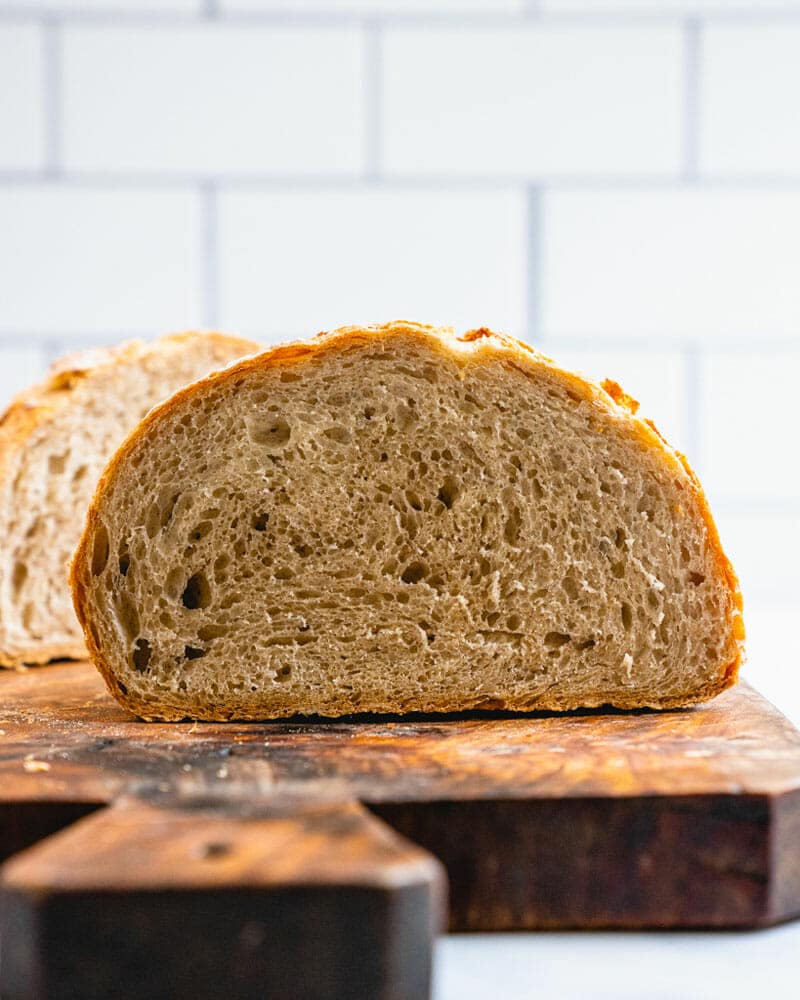
It’s obtained the very best taste: flippantly tangy and strong. The outside is the right crisp crust, and the inside has the right moist chewiness. For those who’ve ever been intimidated by bread baking, this recipe will fully change your perspective. It requires minimal gear, zero ability, and makes a loaf that tastes prefer it’s from a flowery bakery.
Why You’ll Love This No-Knead Bread Recipe
- Minimal hands-on time: It simply requires 5 minutes to combine the dough and one other 5 minutes to form it: no kneading required!
- Newbie-friendly: No want for particular abilities or bread making expertise!
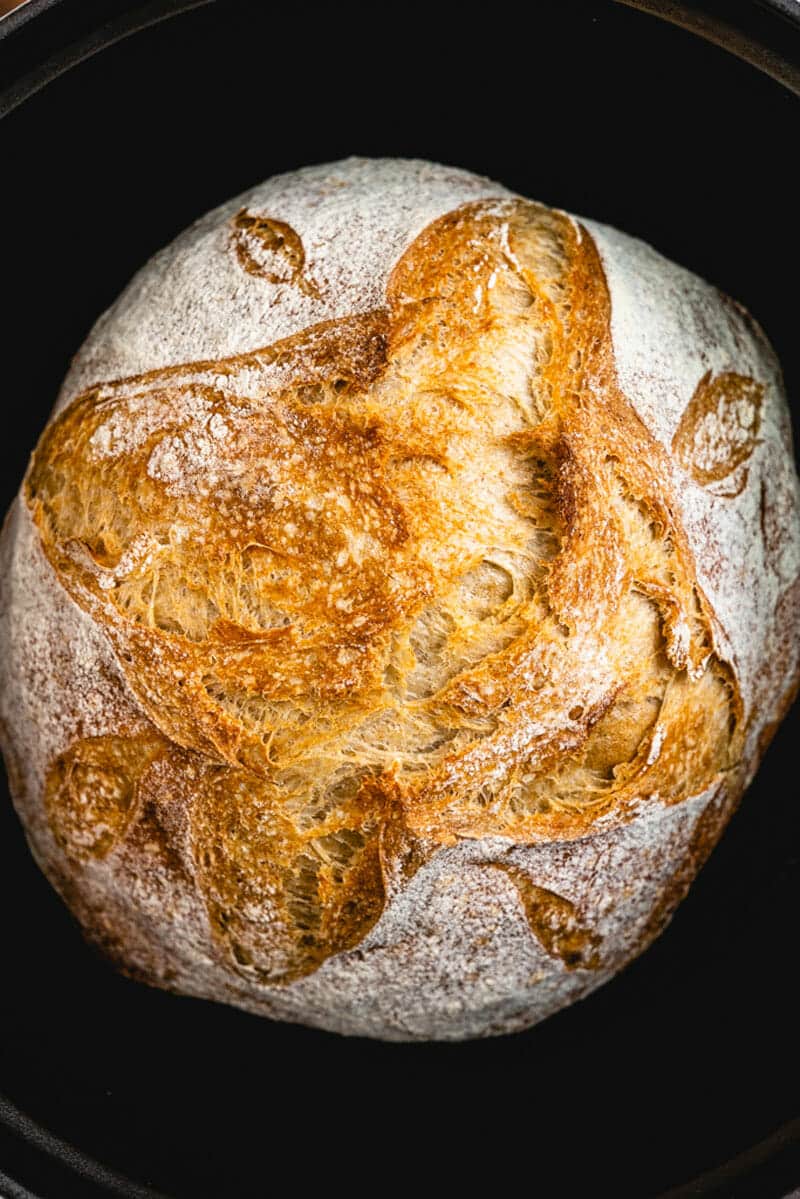
- Bakery-quality outcomes: It has a crispy, golden crust and an open, ethereal crumb like an expert artisan bread
- Easy components: All you want are 4 fundamental components you may have already got in on-hand
- Spectacular however straightforward: It appears and tastes such as you spent hours on it, but it surely’s easy to make
What You’ll Want
Making no knead bread requires a couple of instruments. It’s best to make with a Dutch oven, however it’s also possible to use a pizza stone. There are a number of non-obligatory instruments as effectively that make issues simpler, however should not required. Right here’s what you want!
- All-purpose flour and wheat flour: This types the bottom of the dough and creates the right texture. Only a small quantity of entire wheat flour provides nutty taste and depth. I don’t advocate utilizing substitutes right here.
- On the spot yeast, salt and water: The usual baking solid of characters.
- Apple cider vinegar: It provides a delicate tang, making that attribute artisan bread taste. White vinegar or lemon juice work in a pinch.
- Giant Dutch oven or pizza stone with steam: It is a heavy cooking pot with a lid used for making soups and stews, and it’s superb for getting a crispy crust when baking bread. I take advantage of this 6-quart forged iron Dutch oven. It’s also possible to use a pizza stone and add steam (see under).
- Giant plastic bag: To cowl the dough throughout rises. I reuse the identical massive plastic bag each time.
- Parchment paper: Makes transferring the bread to the recent Dutch oven straightforward.
- Lame or sharp knife: For scoring the bread. A lame is the normal device: I take advantage of this lame.
- Kitchen scale: Essentially the most correct technique to make bread is by weighing the flour. I take advantage of this kitchen scale for measuring.

The right way to Make No-Knead Bread: Overview
Right here’s the fundamental define of what you’re getting your self into with no knead bread. The method takes 5 minutes the evening earlier than, after which about 2 hours the day of. In comparison with my sourdough bread and artisan bread recipes, it’s the quickest and best bread recipe I’ve! Right here’s an outline what to do (or leap to the recipe to get began):
- Combine the dough and relaxation in a single day (5 minutes + 12 to 18 hours): The evening earlier than you wish to bake the bread, mix all components in a bowl. Cowl the bowl with plastic and permit to relaxation at room temperature for 12 to 18 hours. The lengthy fermentation permits gluten to develop naturally with out kneading. After this rise, the dough ought to look bubbly and have doubled in measurement.
- Form the dough (5 minutes): Flour a clear work floor and kind a ball form or boule. Watch this video tutorial for shaping the boule.
- Second rise (1 hour): Place the boule on a bit of parchment paper, cowl with an inverted bowl and permit to relaxation for 1 hour at room temperature.
- Preheat the Dutch oven (half-hour): About half-hour earlier than you’re able to bake, place your Dutch oven with its lid on into the oven and preheat to 475°F. That is what offers you the very best oven spring (the ultimate rise the bread will get within the oven) and crispy crust.
- Rating the bread: Use a pointy knife, lame, or razor blade to make rapidly make a number of shallow slashes throughout the highest of the dough at a 45-degree angle.
- Bake (half-hour): Bake for 16 minutes. Then sporting oven mitts, fastidiously take the bread out of the Dutch oven, place on the oven rack, cut back the temperature to 400°F, and bake for 25 to 27 minutes.
- Cool (45 minutes): That is the toughest half! The bread remains to be cooking because it cools, and the crumb construction wants this time to set correctly.
Ideas for Greatest Outcomes
- Don’t add extra flour throughout shaping: The dough will probably be sticky, and also you may wish to add extra flour. Use simply sufficient flour to stop sticking. An excessive amount of flour throughout this stage will create a dense, heavy loaf!
- Alter proof occasions as needed: In a heat kitchen (over 75°F), the primary rise may be achieved in 12 hours. In a cooler kitchen (65°F), it’d take the complete 18 hours or perhaps a bit longer. Search for the bubbly, doubled look.
- Don’t skip preheating the Dutch oven: The blast of warmth when the dough hits the pot is important for the very best rise and crust improvement (although I’ve had one reader inform me it nonetheless labored!).
- Pay attention for the hole sound or measure temperature: When the bread is finished, tapping the underside ought to make a hole sound. It’s also possible to measure the inner temperature with a meals thermometer, which needs to be 205 to 207°F.
- Be light when shaping the bread: Mild actions protect the the air bubbles that developed in the course of the proofing.
- Rating the bread confidently: Make shallow cuts into the highest of the dough. You wish to lower simply the floor — if it’s too deep it collapses, if it’s too shallow it bursts. Alex did this cross sample for the bread scoring for these pictures.
Variations & Add-Ins
- With out a Dutch oven: For those who don’t have a Dutch oven, you need to use a pizza stone (right here’s the pizza stone I take advantage of). Place the pizza stone on the center rack and a forged iron skillet or heavy baking sheet on the underside rack, and preheat the oven to 475°F. Switch the bread on parchment to the preheated pizza stone. Instantly pour 1 cup of boiling water fastidiously into the preheated skillet or baking sheet, then rapidly shut the oven door to lure the steam.
- Herb bread: When mixing the dough, add 2-3 tablespoons of chopped recent rosemary, thyme, or sage.
- Olive bread: When mixing the dough, add 1 cup of chopped pitted olives (Kalamata, inexperienced, or a mixture): see my Olive Bread recipe.
- Cheese Bread: When mixing the dough, add ½ cup of shredded sharp cheddar or Parmesan cheese.
- Seed-Crusted Bread: Earlier than the second proof, brush the loaf with water and sprinkle on a combination of sesame seeds, poppy seeds, or the whole lot bagel seasoning.

Serving Concepts
This rustic no knead bread actually is unbelievable! As I discussed, my mother and father have made it each week for six years and it’s develop into a complete household favourite. Listed below are a couple of methods to serve it:
- Function a fast aspect on your favourite soup recipes, like lentil soup or bean soup.
- Slices of this loaf make the right toast, like avocado toast or whipped ricotta and honey.
- Use it for next-level sandwiches like connoisseur grilled cheese or a fried egg sandwich.
- Serve it with pasta like pasta puttanesca, or eggplant lasagna.
- Make it into garlic bread by brushing slices with garlic butter or compound butter

Storage Ideas
This no knead bread has no preservatives, so the storage suggestions are totally different from a bread you may purchase from the shop. Right here’s what to do:
- Room temperature storage (2 days): When you’ve baked your home made bread, it’s best eaten inside 48 hours. We retailer ours wrapped in fabric at room temperature. Use a clear dish towel or a bread bag.
- Frozen (3 months): Or, you possibly can freeze it! It’s straightforward to chop your bread in half and freeze half of it! Let it cool to room temperature, then lower it into slices and place it right into a sealed bag or container.
Dietary Notes
This no knead bread recipe is vegetarian, vegan, plant-based, and dairy free.
Regularly Requested Questions
Flat bread normally means the dough over-proofed (rose too lengthy) or your oven wasn’t sizzling sufficient. Be sure that to preheat your Dutch oven totally.
Dense texture usually comes from not sufficient rise time or including an excessive amount of flour throughout shaping.
Gummy inside means the bread was lower too quickly: at all times let it cool for at the least 45 minutes.
Pale crust means the baking time was too brief.
The purpose of no-knead bread is to make artisan-quality bread straightforward to make by any residence baker by taking out the work of kneading. As a substitute of working the dough by hand for 10 minutes, time does the give you the results you want. The prolonged fermentation (12-18 hours) lets the gluten strands to kind naturally via a course of referred to as autolysis, whereas the yeast slowly ferments the flour, creating complicated flavors and that attribute tangy style. This methodology additionally matches simply right into a busy schedule since more often than not is hands-off.
Most parchment paper is secure as much as 420-450°F, which is why I like to recommend eradicating the bread from the Dutch oven after the preliminary 16-minute coated bake and inserting it straight on the oven rack for the remaining time at 400°F.
This recipe is designed for a spherical boule baked in a Dutch oven. I like to recommend attempting my Sandwich Bread Recipe for a loaf pan.
Greatest No Knead Bread Recipe

Make this no knead bread recipe for a crispy crust and tender crumb. Minimal hands-on time and an extended rise create huge taste with nearly no effort.
- Prep Time: 1 hour half-hour (together with in a single day)
- Prepare dinner Time: 40 minutes
- Complete Time: 2 hours 10 minutes
- Yield: 12 to 14 slices 1x
- Class: Bread
- Technique: Baked
- Delicacies: Artisan
- Weight-reduction plan: Vegan
Elements
- 3 cups all objective flour (375 grams)
- ½ cup entire wheat flour (62 grams)
- ½ teaspoon instantaneous or lively dry yeast
- 9 grams 1 ½ teaspoons kosher salt
- 1 ⅓ cups water (314 grams)
- 1 tablespoon apple cider vinegar (15 grams)
Directions
- Combine the dough & relaxation in a single day: In medium bowl, stir collectively the all objective flour, entire wheat flour, yeast and salt. Add the nice and cozy water and vinegar and stir with a wood spoon or dough whisk till all flour is integrated. Place the bowl in a proofing bag or cowl with plastic wrap. Relaxation at room temperature in a single day (12 to 18 hours). The ensuing dough will probably be bubbly and really sticky.
- Form the dough: When able to bake, take away the dough from the bowl onto a clear, lightly-floured countertop. Gently unfold the dough right into a sq. after which fold up both sides right into a packet. Flip the dough over. Place your arms behind the dough and gently pull the dough in direction of you to extend the stress on the floor of the dough. Rotate and repeat till you’ve gotten a boule form. Comply with this video tutorial for boule shaping approach.
- Proof the dough for 1 hour: Place the boule on a bit of parchment paper about twice the width of the boule. Cowl the dough with an inverted massive bowl and relaxation one hour.
- Preheat the oven: Preheat the Dutch oven (with lid) at 475°F for half-hour. (Or for the pizza stone methodology, place the pizza stone on center rack of oven, off to at least one aspect. Place a forged iron pan or thickest baking sheet on the rack slightly below and off to the opposite aspect of oven. You’ll pour water into it later to create steam.)
- Rating the bread: Use a pointy knife or lame to chop a number of shallow slits at angle throughout the highest of the dough. The images present this cross sample.
- Bake for 16 minutes: Working rapidly and punctiliously with oven gloves or mitts, switch the dough on the parchment paper to the preheated Dutch oven, then place the highest on. Bake for 16 minutes. (Or for the pizza stone methodology, switch the dough on the parchment paper to the preheated pizza stone. After the bread is on the the stone, make the steam: cowl your hand with a towel and really fastidiously pour 1 cup of water onto the cast-iron pan or baking sheet, then instantly shut the door.
- Cut back to 400°F and bake for 25 to 27 minutes: After the 16 minutes, cut back the oven temperature to 400°F. Take away the Dutch oven, fastidiously take out the bread, and set the bread straight onto the oven rack. (Or for the pizza stone methodology, open the oven door a few occasions to fan out extra moist air.) Bake for a further 25 to 27 minutes, till hole when tapped or inside temperature is at 205 to 209 Fahrenheit. Take away the bread from the oven and permit it to chill on a cooling rack for at the least 45 minutes. After cooling, the bread is able to eat. Retailer the bread wrapped in fabric or in a bread bag on the counter for as much as 2 days (don’t retailer in plastic). Freeze (sliced) wrapped in foil in a plastic bag for a number of months.
Notes
Flour substitutions: You should utilize 100% all-purpose flour for those who don’t have entire wheat.
Salt: I take advantage of Morton’s kosher salt or high-quality sea salt. For those who use Diamond Crystal, you possibly can improve barely.
With out a Dutch oven: See the preheated pizza stone with steam methodology.
Storage: Retailer wrapped in fabric at room temperature for as much as 2 days, or freeze sliced bread in a sealed bag for as much as 3 months.